CUSTOMER CASE / New Product Prototype Project
A new bow design
from sketch to sample
A new design of bow-tie decorative buckle · Zinc alloy samples produced within 24 hours from customer requirements
The client provided a schematic diagram of a ribbon-shaped hardware component and requested production using the previous specifications. "Longde Hardware" quickly converted the schematic into a 3D model within 1 hour based on experience, verified it with a physical prototype, and then proceeded with the "zinc alloy spin casting" prototyping process. Within 24 hours, the design was gradually brought to life. This allowed the client to quickly verify their ideas based on the physical prototype.
Refer to terms: prototyping = prototyping.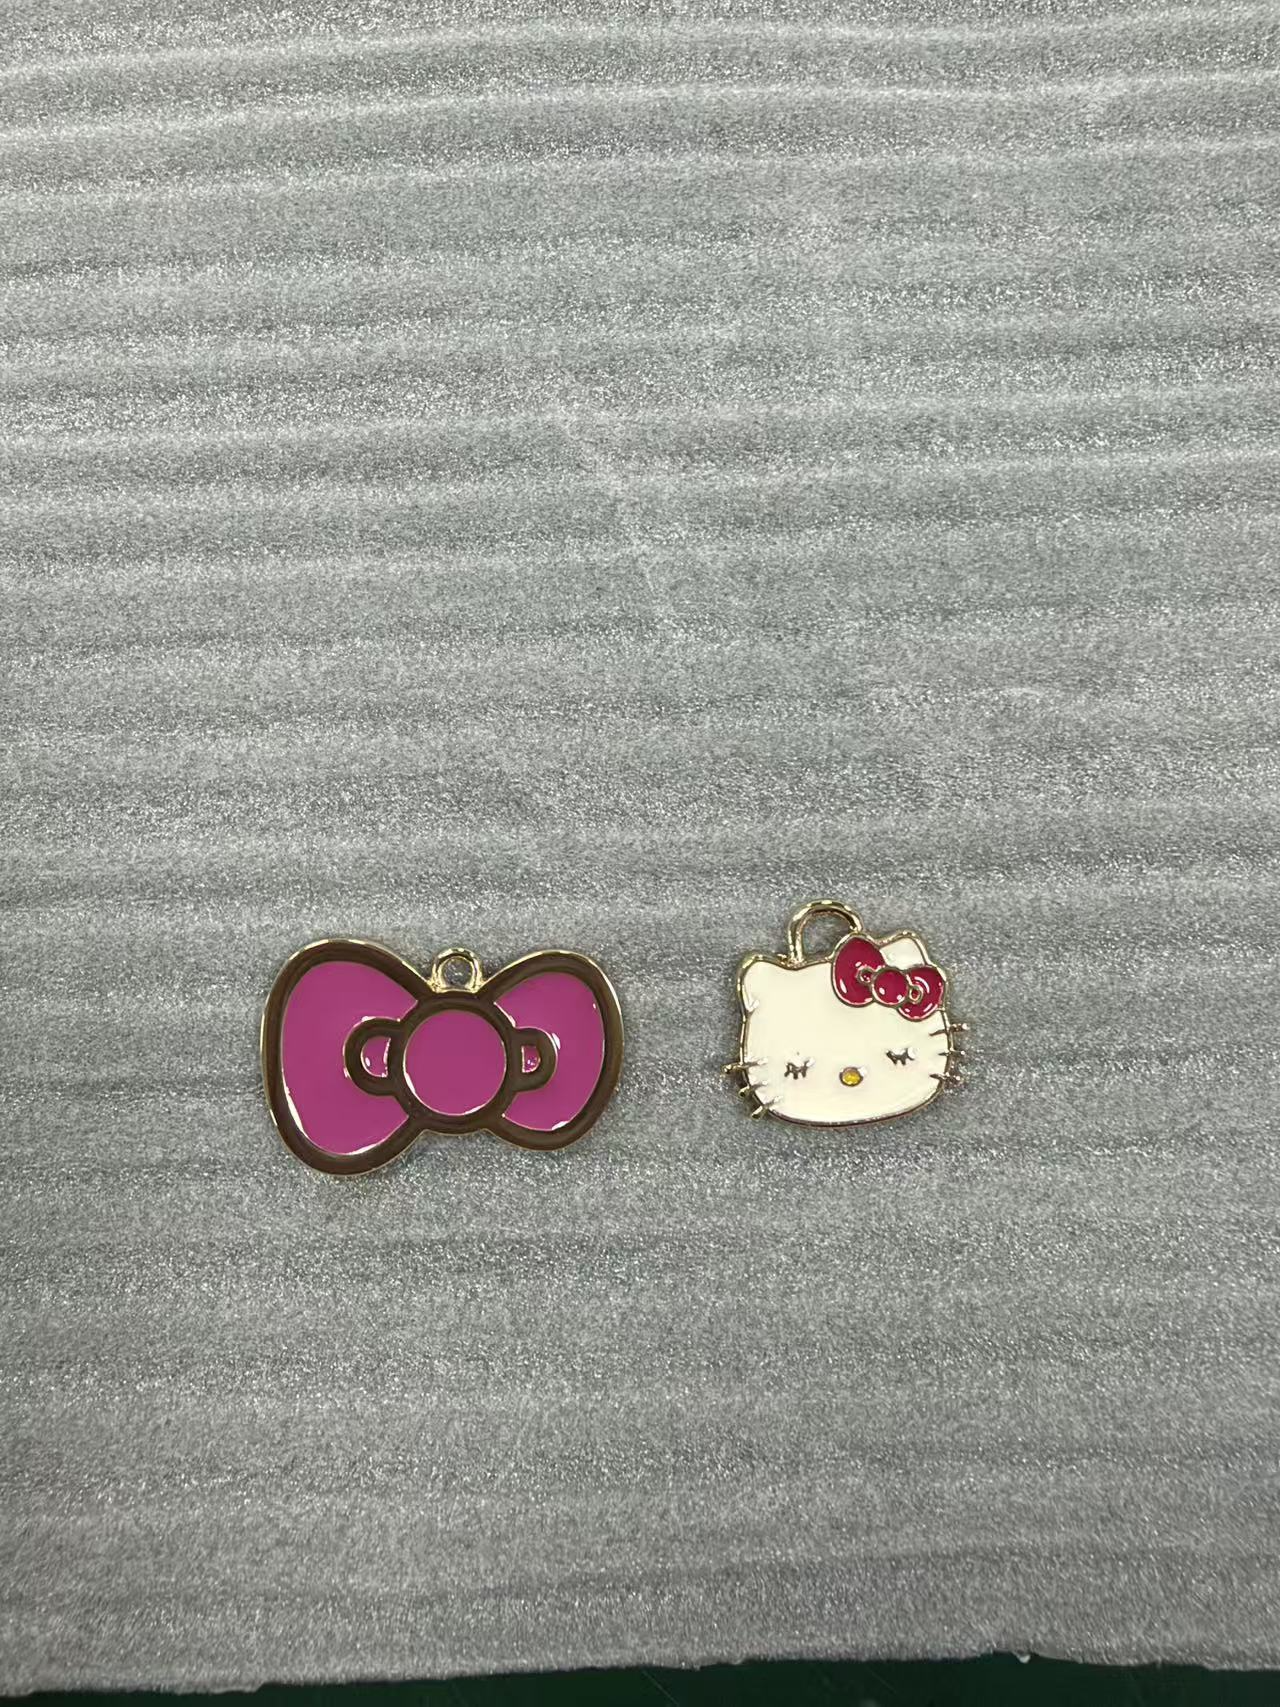
The sampling path / Prototyping path
First verify the shape, then proceed with the metal sample.
| Time required | Prototyping phase |
|---|---|
| 1About an hour | Complete the 3D diagram as required |
| 2About an hour | 3D printing of physical objects for verification |
| 12About an hour | Entering the mold-making and casting prototyping stage |
| 24An hour later | Produced zinc alloy spin casting samples |
Project records put modeling at about one hour and printing at about two hours, yielding a printed sample in roughly three hours. The later mold-making and spin-casting stage took about 12 hours. The spin-cast zinc alloy sample was ready at the 24-hour mark.
01 THE BRIEF / Project Background
The customer has proposed a new design.
First, align the requirements.
The starting point for this development was a new bowtie design suggestion provided by the client, with only a flat schematic diagram provided.
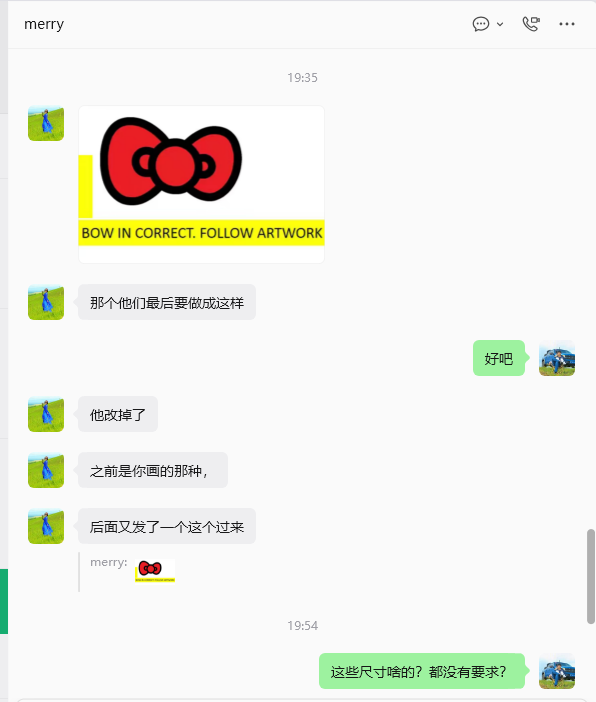
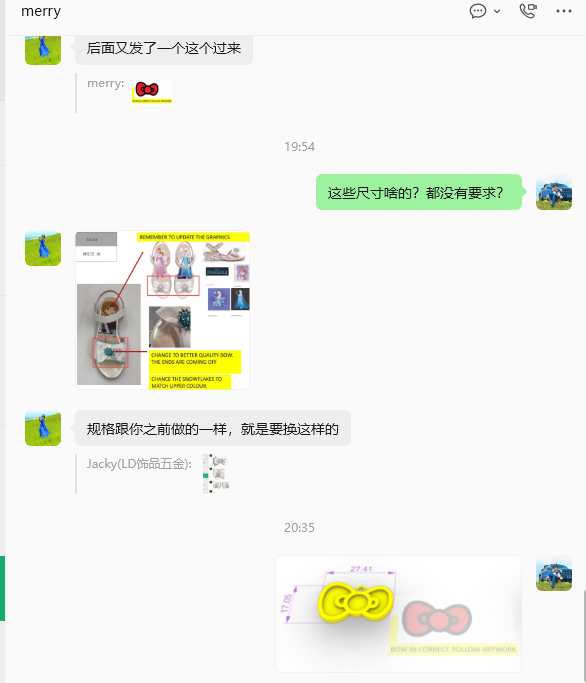
In the communication, "Longde Hardware" asked for size requirements, and the customer replied that the specifications would follow the previous practice, while the design would be adjusted according to the new reference. The core issue to be addressed is: converting the flat visual schematic into a physical object that can be confirmed in terms of size, shape, and details.
- Development Object
- Bow-tie-style decorative buckles
- Key requirements
- Adjust the shape according to the new schematic diagram, maintaining the previous specifications.
- Validation Order
- 3D visualization confirmation → Physical object printing verification → Production of zinc alloy samples
02 The Process / The entire prototyping process
From the schematic diagram on the screen to the tangible metal samples.
Separate the stages of modeling, validation, verification, and metal prototyping into distinct nodes. Each stage revolves around the problems that need to be solved in the next step. Explain the entire prototyping process in detail.
STEP 01 Confirmation of requirements
Clearly define the new design and maintain the same specifications
After receiving the new design sketch from the customer, "Longde Hardware" first asked about the dimensions, and then confirmed that the "specifications remained the same as before, with the shape changed to a new style." The change in design and the specifications were then passed on to the modeling process.
This step's outputRequirements for the appearance and specifications for access to modeling
This step's output example
The following is the confirmed WeChat communication record for this requirement. You can click to view the original image.
STEP 02 About 1 hour / 3D modeling
Turn a schematic diagram into a three-dimensional solution
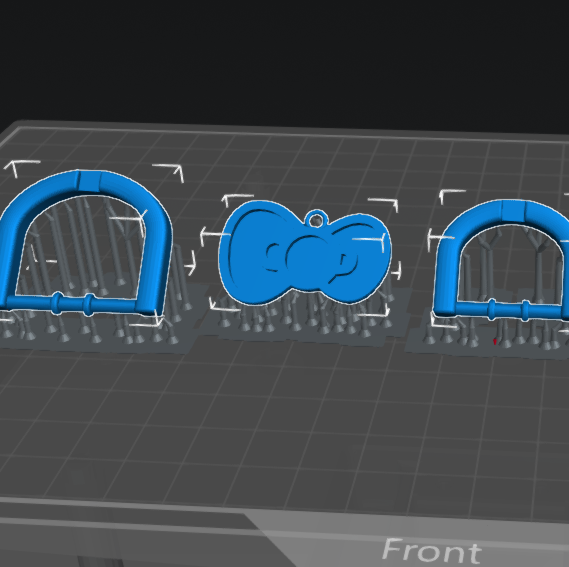
"Longde Hardware" creates 3D designs based on confirmed requirements and experience. It transforms the contours, layers, and connections of "ribbon metal hardware" into a three-dimensional form, allowing the customer to confirm the size and shape. After confirmation, the process moves on to the printing stage.
This step's output3D model for confirmation and printing connection
STEP 03 Approximately 2 hours / Print verification
First obtain the physical item and quickly have it verified by the customer for its functions.
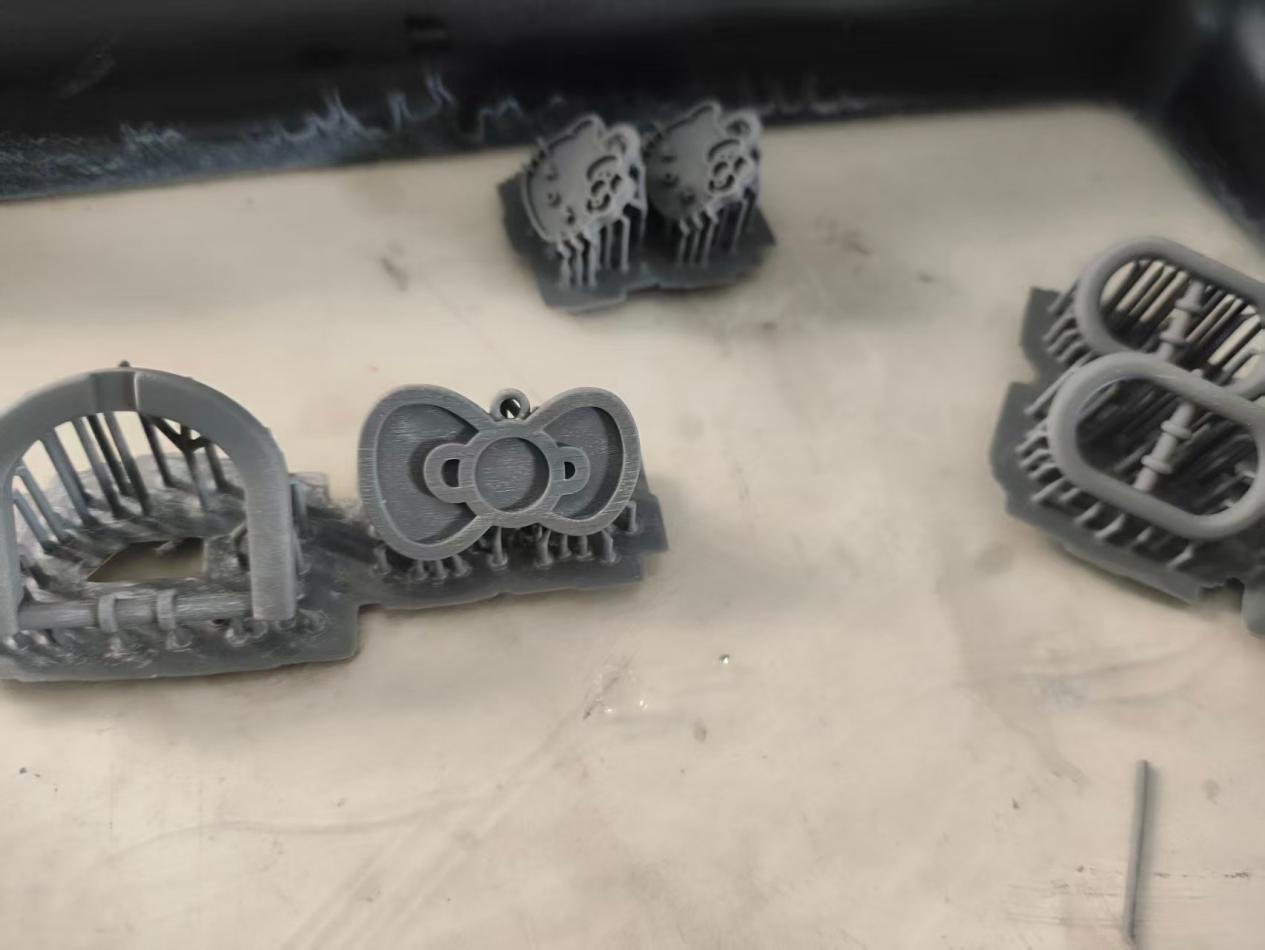
After the customer confirms the dimensions of the 3D model, 3D printing is arranged. It takes about 2 hours to print the model, and a total of about 3 hours from modeling to obtaining the printed product. First, the product is given to the customer for functional verification. Based on the customer's verification results, modifications are made, and then a production order is placed for a sample made of zinc alloy material.
In the photo, the three-dimensional layers and connection holes of the bow tie can be seen, with printing supports retained at the bottom. The result at this stage is a verified 3D printed sample.
This step's output3D printed samples that can be used for physical verification
STEP 04 Approximately 12 hours / Metal prototyping
Connecting the spin casting process to produce zinc alloy samples
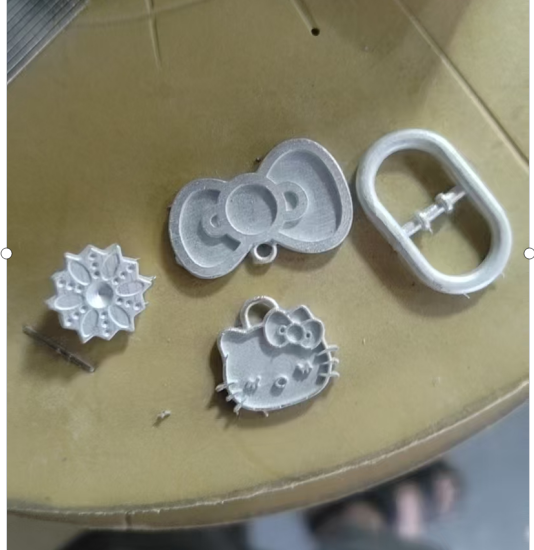
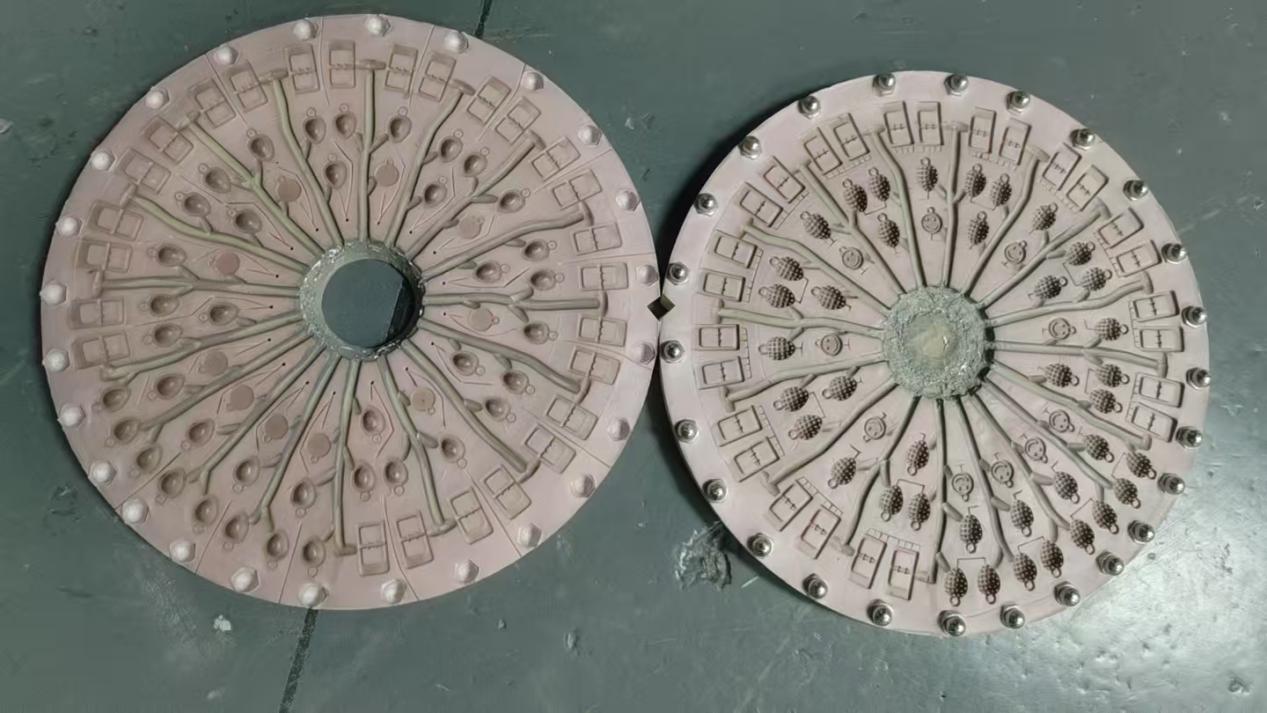
After the customer verifies the 3D-printed sample, "Longde Hardware" presses the 3D physical sample into soft clay. After high-temperature and high-pressure treatment, a hardened mold is formed. Then, zinc alloy liquid is poured in, and the metal liquid is forced into the mold cavity using a rotating machine to create a metal sample.
The customer case documentation indicates that this subsequent stage will take approximately 12 more hours, which proves that "Longde Hardware"'s claim of "fast 24-hour prototyping" is based on factual evidence.
This step's outputZinc alloy samples for subsequent confirmation
03 THE TAKEAWAY / Case Results
Check a physical sample
before committing to production
The bow clasp project shows how Longde moved from a 3D design to a printed prototype and then a zinc alloy sample in 24 hours.
The common practice of "Longde Hardware" is to first align the appearance using 3D modeling, then verify the product through printing, and finally arrange for metal prototyping. For new product development, the value lies in converting the design into a sample that can be discussed and confirmed as early as possible.
- Applicable Prerequisites
- The appearance and specifications must be clear, and the customer should confirm the model in a timely manner.
- Time boundaries
- Longde Hardware states a target of completing 99% of new samples within 24 hours.